

Tick Disposal Methods: A Comprehensive Guide for Safe and Effective Removal
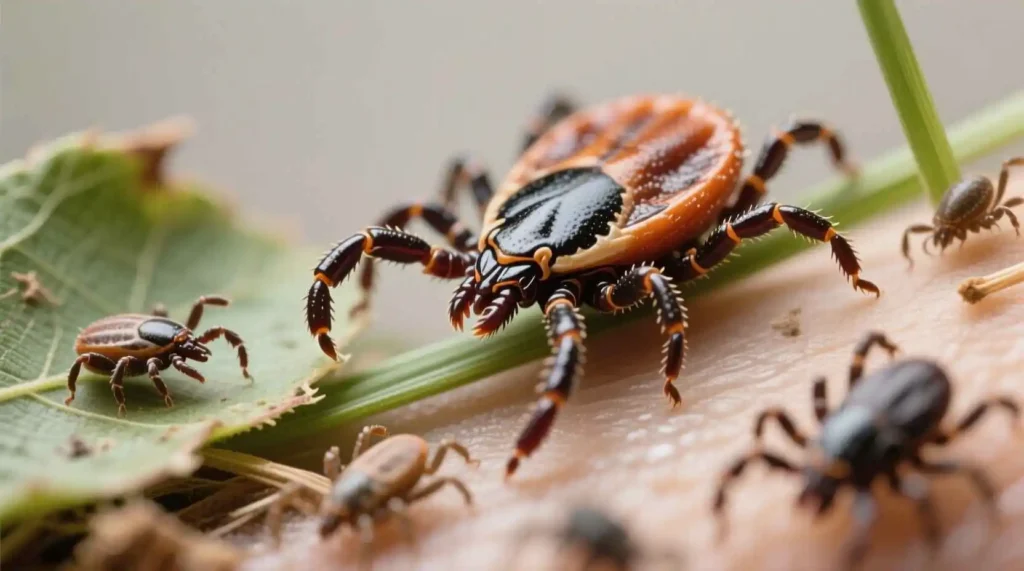
Ticks are often underestimated, perceived by many as little more than an itchy inconvenience or a minor bother after a walk in nature. However, their true nature is far more insidious and potentially dangerous. These minuscule arachnids are, in fact, highly efficient biological vectors for a formidable array of zoonotic diseases, carrying pathogens that can inflict serious, long-term health consequences. Beyond the widely recognized Lyme disease and Rocky Mountain spotted fever, they can transmit debilitating conditions such as babesiosis, anaplasmosis, ehrlichiosis, and tick-borne relapsing fever – each posing unique and potentially severe health challenges to humans and their beloved pets. Species like the blacklegged tick (Ixodes scapularis), the American dog tick (Dermacentor variabilis), and the Lone Star tick (Amblyomma americanum) are just a few of the notorious culprits responsible for this silent proliferation of illness.
The moment one of these blood-feeding parasites latches onto a person or an animal, the stakes are instantly raised. The phrase “the clock starts ticking” isn’t just a figure of speech; it’s a critical biological imperative. Once attached, the tick begins its blood meal, and during this feeding process, pathogens, often residing in the tick’s salivary glands or gut, require a certain amount of feeding time to successfully transfer to the host’s bloodstream. Every minute they remain embedded increases that precious window of opportunity for disease transmission.
Consequently, the swift, precise extraction of an embedded tick is not merely good practice – it is your primary defense against the insidious progression of these diseases. This must be followed immediately by equally vital safe disposal. Improper removal methods, such as crushing the tick or leaving behind parts of its mouthparts, can inadvertently force more infectious agents into the wound or lead to secondary infections. Similarly, simply flicking a tick away allows it to potentially find another host, perpetuating the cycle of risk. Therefore, understanding and executing the correct procedure for both removal and disposal is absolutely essential to minimize the risk of pathogen transmission and safeguard health.
This comprehensive guide is meticulously designed to empower you with the precise knowledge and practical skills necessary to effectively neutralize this threat. We will delve deeply into the intricate science underpinning effective tick removal, explaining why certain techniques are recommended and how they prevent further pathogen transfer. Furthermore, we will provide a detailed comparison of the most reliable and recommended disposal techniques, ensuring that once removed, the threat is definitively contained. Finally, we will furnish you with clear, actionable, step-by-step instructions that demystify the entire process. By equipping you with this critical information, we aim to transform potential panic into confident, decisive action, ensuring you’re prepared to handle these persistent, peril-carrying arthropods with expert precision every time.

“The best way to get rid of ticks is to prevent them from getting on you in the first place.”
— Centers for Disease Control and Prevention (CDC)
Below, we adopt a first‑person plural perspective (“we”) because tackling ticks is a collective effort—whether we are outdoor enthusiasts, pet owners, or healthcare professionals. Let’s dive in.
1. Why Proper Tick Disposal is a Critical Final Step
The successful removal of a tick from skin is a significant first step in preventing potential health issues. However, the process doesn’t end there. What you do with the tick after removal is equally — if not more — important. The goal is twofold: to ensure the immediate site of the bite is clear and to completely neutralize any lingering threat the tick itself might pose.
1. Preventing Remaining Mouthparts and Localized Issues
When a tick is removed, meticulous care is crucial to prevent its mouthparts from remaining embedded in the skin. While these mouthparts, once separated from the tick’s body, cannot actively transmit disease, their retention can lead to several undesirable outcomes. Incomplete removal often results in localized inflammation, manifesting as redness, swelling, itching, or even a small bump at the bite site. This inflammatory response can be uncomfortable and, more significantly, creates an open wound that is susceptible to secondary bacterial infections. Furthermore, the presence of these foreign bodies can complicate future identification of any rash or reaction, potentially delaying diagnosis if a tick-borne illness were to develop. Ensuring complete removal simplifies monitoring of the bite site for any subsequent symptoms.
2. Containing the Tick and Its Potential Threats
Perhaps even more critical is the proper containment of the tick itself. Regardless of whether the tick appears dead, alive, or has been squashed, it may still harbor infectious agents acquired from its previous blood meals. These pathogens — which can include bacteria, viruses, and parasites responsible for diseases like Lyme disease, anaplasmosis, babesiosis, and more — can remain viable for a surprising amount of time.
If the tick is not disposed of correctly, several dangerous scenarios can unfold:
- Re-attachment to Another Host: A tick, even if seemingly inactive, can revive and re-attach to another unsuspecting host. This could be a family member, a curious child, or a pet (like a dog or cat) that brushes against an improperly discarded tick on furniture, bedding, or even clothing.
- Environmental Contamination: If a tick is crushed carelessly, its internal contents, including any pathogens it carries, could be released. These infectious agents, along with any viable eggs (if it’s a female tick), can then contaminate the immediate environment, posing a risk to anyone or anything that comes into contact with the contaminated surface.
The Dangers of Improper Disposal
The seemingly innocuous act of improper disposal—such as simply tossing the tick into an unsealed trash bin or down a sink drain without containment—carries significant risks. While it might appear harmless, it directly facilitates accidental contact for:
- Children: Young children are naturally curious and might unknowingly interact with an exposed tick in a wastebasket.
- Cleaning Staff: Individuals emptying trash bins are at a heightened risk of exposure, especially if they handle unsealed waste.
- Other Animals: Household pets can easily sniff out or come into contact with a live or recently deceased tick in an open trash can, potentially becoming infected themselves or bringing the tick back into direct contact with humans.
Moreover, it’s crucial to understand that certain pathogens can survive for weeks outside a host, particularly when conditions are favorable. Cool, humid conditions — often found in unsealed waste receptacles, damp basements, or even a cool hallway floor — provide an environment where these microscopic threats can remain viable long after the tick has been removed from its original host. This extended viability means that an improperly disposed tick continues to pose a risk for a prolonged period, turning a potential one-time exposure into an ongoing hazard within your living space.
In essence, proper tick disposal is not merely a formality; it’s a critical safety measure that protects not only the individual who was bitten but also everyone else in their household and their environment from the persistent threat of tick-borne diseases.
2. Overview of Common Disposal Methods
| Method | Effectiveness* | Safety | Cost | Ease of Use | Recommended For |
| Seal in a Zip‑Lock bag and discard in regular trash | Moderate – kills the tick but may allow accidental escape if bag ruptures | Low – risk of leakage | $0‑$0.10 (bag) | Very easy | Low‑risk, non‑infectious ticks (e.g., short‑duration bites) |
| Submerge in 70 % isopropyl alcohol for 5 min, then bag | High – alcohol kills instantly | Medium – handling alcohol requires gloves | $0‑$1 (small bottle) | Easy | Ticks removed from humans or pets, especially when disease risk is high |
| Freezing (place in sealed container, freezer ≥ -20 °C for 24 h) | Very high – ensures death | High – no chemical exposure | $0 (home freezer) | Easy | Laboratory settings or when alcohol is unavailable |
| Burning (using a flame‑proof container or candle) | Very high – incinerates the tick | Medium – fire risk, requires ventilation | $0‑$0.50 (matches) | Moderate | Rural areas without easy trash collection |
| Flush down the toilet | Low‑moderate – may not guarantee death, risk of environmental contamination | Low – no chemicals, but potential for pipe blockage | $0 | Very easy | Quick disposal when other options are unavailable |
| Dispose in commercial biohazard sharps container | Highest – designed for hazardous biological waste | Highest – sealed, puncture‑proof | $5‑$10 per container (shared) | Moderate | Hospitals, veterinary clinics, or high‑risk situations |
*Effectiveness reflects how reliably the method kills the tick and prevents re‑use.
Key Takeaways from the Table
- Alcohol and freezing are the most reliable non‑chemical methods for home use.
- Seal‑in‑bag is acceptable for low‑risk situations but should be accompanied by proper labeling.
- Biohazard containers are ideal when dealing with ticks that have tested positive for pathogens or when you work in a clinical setting.
Step by Step: A Comprehensive Protocol for Tick Removal and Secure Disposal
Below is a unified protocol designed for safe and effective tick removal, compatible with various subsequent disposal methods. This standardized approach ensures consistency, minimizes risks, and prepares you for the appropriate final disposal technique, which you will adjust based on your chosen method (e.g., flushing, sealing, or submission for identification).
1. Prepare Your Workspace and Gather Essential Equipment
Before attempting any tick removal, it is crucial to assemble all necessary tools in a well-lit area. This proactive preparation ensures a smooth, efficient, and hygienic process, significantly reducing the risk of complications, skin irritation, or potential pathogen transfer.
Fine-pointed tweezers or a specialized tick removal tool (e.g., a tick key, lasso tool): These are the most critical instruments for safe and effective tick removal. Fine-pointed tweezers are highly recommended over blunt-nosed or household tweezers because their narrow tips allow for precise grasping of the tick as close to the skin’s surface as possible. This precision helps to avoid compressing the tick’s body, which could inadvertently force more fluids (and potentially pathogens) into the bite wound. Specialized tick removal tools are also excellent choices as they are designed to gently leverage the tick out without squeezing or twisting, often featuring a notch or scoop to slide under the tick.
Disposable gloves (latex or nitrile): For personal protection and to prevent direct skin contact with the tick or the bite site. Disposable gloves act as a crucial barrier against potential pathogens that the tick might carry or any bodily fluids present. It is good practice to wear them during the entire removal and disposal process, and always dispose of them immediately after use to prevent cross-contamination.
Alcohol wipes or a small bottle of 70% isopropyl alcohol (optional, for post-removal use): While these should not be used on the tick itself (as it can irritate the tick and cause it to regurgitate potentially infectious fluids), they are invaluable for sanitizing the bite area after the tick has been successfully removed. A 70% isopropyl alcohol solution is a highly effective antiseptic for cleaning the skin and for sterilizing your tools post-procedure. Keep them readily available for immediate post-removal hygiene.
Sealable plastic bag, zip-lock bag, or a small, airtight container: This item is essential for the secure containment of the removed tick. Its purpose is twofold: first, to prevent the escape of the tick, ensuring it poses no further risk; and second, to safely contain it if you need to retain the tick for identification by a medical professional or public health authority, or for laboratory analysis in regions where tick-borne disease surveillance is active. Choose a container that can be securely sealed to prevent any possibility of the tick escaping.
.Performing the Removal: A Step-by-Step Approach
Once a tick is discovered embedded in the skin, prompt and proper removal is crucial to minimize the risk of disease transmission. Always use a pair of fine-tipped tweezers for this procedure, and ensure they are clean before you begin.
Position Your Tweezers Precisely:
Grip Close to the Skin: Gently but firmly grasp the tick as close to the skin’s surface as possible. The goal is to get a hold of the tick’s mouthparts, not its body.
Focus on the Mouthparts: Specifically target the tick’s head and mouthparts, which are typically black or darker than its body. Avoid squeezing or crushing the tick’s body, as this can force infected fluids from the tick into the bite wound, increasing the risk of pathogen transmission. Using blunt-nosed tweezers can lead to squeezing the body, so fine-tipped tweezers are essential.
Apply Steady, Even Pressure for Extraction:
Pull Upward and Straight: With your grip established, pull the tick straight upward, away from the skin, using slow, constant, and even pressure. Imagine you’re trying to lift the tick directly out of the skin without any lateral movement.
Avoid Twisting or Jerking: Do not twist, jerk, or wiggle the tweezers. Sudden movements or rotations can easily cause the tick’s mouthparts to break off and remain embedded in the skin. Leaving mouthparts behind can lead to local irritation, inflammation, or even infection, making proper removal vital. A smooth, persistent pull is the key to detaching the entire tick.
Inspect the Bite Site and Aftercare:
Thorough Inspection: After the tick has been removed, carefully inspect the bite site using a magnifying glass if necessary. Look closely to ensure that no part of the tick—especially the mouthparts—has broken off and remains embedded in the skin.
If Parts Remain: If you do observe any tick parts still in the skin, try to remove them gently with the fine-tipped tweezers. If this proves difficult or if the remaining parts are very small, clean the area thoroughly and monitor it. Often, tiny fragments will work their way out naturally over a few days, similar to a splinter. However, if irritation or signs of infection develop, or if you are concerned, consult a healthcare professional.
Cleanse the Area: Thoroughly clean the bite area and your hands with rubbing alcohol, an iodine scrub, or soap and water immediately after the tick is removed.
Dispose of the Tick: Dispose of the live tick by placing it in rubbing alcohol, sealing it in a plastic bag/container, wrapping it tightly in tape, or flushing it down the toilet. Do not crush the tick with your bare fingers.
Monitor for Symptoms: Keep a close eye on the bite site for several weeks for any signs of rash (especially the characteristic bulls-eye rash of Lyme disease). Also, be alert for symptoms such as fever, fatigue, headaches, or muscle aches, which could indicate a tick-borne illness. If any of these symptoms appear, seek medical attention promptly and inform your doctor about the tick bite.
Important Things to Avoid During Tick Removal:
- Do NOT use “folk remedies” like applying petroleum jelly, nail polish, or a lit match to the tick. These methods are ineffective, can irritate the tick and cause it to regurgitate fluids into the wound (increasing disease risk), or cause burns to the skin.
- Do NOT crush the tick’s body during removal.
- Do NOT twist or jerk the tick out.
Post-Removal Care & Tick Management
Once the tick has been safely and completely removed, it’s crucial to follow these steps for proper aftercare and tick disposal:
1. Disinfect the Area
- Prompt Action: Immediately after the tick is detached, gently cleanse and disinfect the bite area.
- Antiseptic Application: Apply an antiseptic solution such as povidone iodine, rubbing alcohol (at least 70% isopropyl alcohol), or an antiseptic wipe directly to the skin where the tick was attached.
- Purpose: This step is vital to reduce the risk of bacterial infection at the wound site, which can sometimes occur even after a clean tick removal.
- Monitoring: Allow the area to air dry, and continue to monitor the bite site over the next few days for any signs of irritation, redness, swelling, or rash.
2. Contain the Tick
- Importance of Containment: Safely containing the removed tick is highly recommended. This allows for potential identification by an expert and, if necessary, laboratory testing for tick-borne pathogens, which can be invaluable if you or your pet later develop symptoms of a tick-borne illness.
- Choosing a Vessel: Carefully pick up the tick (using tweezers or a small piece of tape if preferred, avoiding direct contact with bare hands) and place it directly into your chosen containment vessel. Ideal containers include:
- A small, sealable plastic bag (e.g., a Ziploc snack or sandwich bag).
- A tightly-lidded pill bottle or small glass jar.
- A sturdy freezer bag.
- Ensure the vessel is clear so the tick can be seen.
- Preservation Method:
- If using alcohol: Submerge the tick immediately and completely in rubbing alcohol (at least 70% isopropyl alcohol). This will kill the tick and help preserve it for analysis.
- If not using alcohol: Ensure the bag or container is sealed tightly. You might consider double-bagging it to prevent accidental escape.
- Important Note: Do not crush the tick between your fingers, as this could expose you to potential pathogens.
3. Label (Highly Recommended and Helpful)
- Context for Testing: While optional, clearly labeling the containment vessel is incredibly valuable for future reference, especially if health concerns arise and the tick needs to be sent for laboratory testing.
- Information to Include: Using a permanent marker, write the following information directly on the bag/bottle or on a piece of tape affixed to it:
- Date of Bite: The exact date the tick was discovered and removed.
- Location of Bite: Specify where on the body the tick was attached (e.g., “right ankle,” “behind ear,” “on pet’s shoulder”).
- Host: Indicate who the tick was removed from (e.g., “human – [Your Name],” “dog – [Pet’s Name],” “cat – [Pet’s Name]”).
- Geographic Location (Optional but good): Where the tick exposure likely occurred (e.g., “backyard – [City, State],” “hiking trail in [Park Name]”).
- Tick Type (if known): If you can identify the type of tick (e.g., “deer tick/blacklegged tick,” “dog tick,” “lone star tick”), include this.
- Value: This detailed information provides crucial context for healthcare providers or veterinarians, aiding in diagnosis and treatment if a tick-borne illness is suspected. Keep the labeled container in a safe place, such as a cool, dry cabinet, until you decide whether or not to pursue testing.
4. Dispose
- Preventing Reattachment: Proper disposal of the contained tick is essential to prevent it from reattaching to another host or contributing to the local tick population.
- Disposal Protocols: Follow the specific disposal protocol recommended by your local health authority or any provided educational materials. Common safe disposal methods include:
- Regular Trash: If the tick is sealed tightly in an airtight bag or container (especially if submerged in alcohol), it can usually be safely placed into your household trash.
- Biohazard Container: In certain clinical or research settings, or if specifically instructed, place the alcohol-submerged or sealed tick into a designated biohazard waste container.
- Avoid certain methods: Never try to crush a tick with your bare hands, and generally avoid flushing it down the toilet unless it’s explicitly recommended as a method to ensure it’s truly dead and won’t survive the plumbing.
5. Clean Up
- Personal Hygiene: Completing the tick removal process involves a final, crucial step of thorough clean-up to ensure personal hygiene and prevent any potential contamination.
- Remove Gloves: Carefully peel off and dispose of any gloves you were wearing, turning them inside out as you remove them to contain any potential contaminants.
- Wash Hands Thoroughly: Immediately after glove removal, wash your hands thoroughly with warm water and soap for at least 20 seconds, scrubbing all surfaces, including between fingers and under nails, and rinsing well. This is crucial to remove any unseen pathogens or residues.
- Disinfect Tools: Any tools used during the tick removal process, such as tweezers, magnifying glasses, or specialized tick removers, should be disinfected. You can do this by:
- Washing them with soap and hot water.
- Submerging them in rubbing alcohol (70% or higher) for several minutes.
- Boiling them for 10 minutes (if the material allows).
- Wipe them dry before storing them in a clean, dry place.
Special Considerations: Comprehensive Tick Management and Post-Bite Action
Effective tick management extends beyond simple removal, encompassing crucial decisions about medical follow-up, responsible pet care, and environmentally sound disposal methods. Understanding these special considerations can significantly reduce the risks associated with tick bites and promote overall well-being.
A. When to Seek Medical Attention
Prompt evaluation by a healthcare professional is crucial in certain scenarios following a tick bite, as early intervention can prevent the progression of tick-borne illnesses.
- Tick attached for > 24 hours: The duration of attachment is a critical factor in pathogen transmission. While some pathogens can be transmitted in a shorter timeframe, many common tick-borne diseases, such as Lyme disease, typically require the tick to feed for at least 24-36 hours before infectious agents can be successfully transferred to the host. If you discover a tick that appears engorged or has been attached for an extended period, it significantly increases the risk of pathogen transmission, warranting closer monitoring or a discussion with a clinician about potential prophylactic measures.
- Signs of illness: Be vigilant for any symptoms that emerge within days to several weeks after a known or suspected tick bite. These symptoms can often be non-specific and flu-like, making diagnosis challenging, but they should never be ignored. Key indicators include:
- Fever or chills: A common initial response to infection.
- Rash: Particularly a circular expanding rash (erythema migrans) characteristic of Lyme disease, but other rashes can also occur.
- Joint pain and swelling: Can be an early sign of inflammatory response to infection.
- Muscle aches, fatigue, headache, or swollen lymph nodes: General systemic symptoms indicating the body is fighting an infection. Any of these symptoms appearing within weeks of a tick encounter necessitates a clinician’s evaluation for proper diagnosis and timely treatment, which can significantly improve outcomes.
- High-risk species: Knowing the common tick species in your region and their associated risks is invaluable. If you suspect the attached tick is a known vector for serious diseases, it’s prudent to err on the side of caution.
- Ixodes scapularis (black-legged tick or deer tick): This small tick is the primary vector for Lyme disease, anaplasmosis, and babesiosis in many parts of North America. Its prevalence and association with severe illnesses make any bite from this species a potential concern.
- Dermacentor variabilis (American dog tick): While larger, this tick is a known carrier of Rocky Mountain Spotted Fever and tularemia. If you are able to identify the tick, or if it was removed from an area known for these species, inform your healthcare provider. They may advise closer monitoring, specific testing, or even a preventative antibiotic dose, depending on local epidemiology and individual risk factors. Consider saving the tick for identification by a professional if possible.
B. Pets and Tick Disposal
Pets, especially those that spend time outdoors in wooded or grassy environments, are frequent carriers of ticks. Their fur provides ideal hiding spots, and ticks on pets can easily transfer to humans within the household. The fundamental principles of tick removal and disposal for pets are similar to those for humans, but with specific considerations.
- Use a pet-specific tick removal tool: While standard fine-tipped tweezers can work, specialized tools like tick removers (e.g., tick twisters, tick keys) are designed to safely grasp the tick close to the skin without squeezing its body or leaving mouthparts embedded. These tools are often more effective and cause less stress to both pet and owner, especially when dealing with dense fur.
- After disposal, bathe your pet with a mild pet-safe shampoo: After successfully removing and disposing of the tick, a thorough bath can help to remove any remaining tick debris, soothe the skin at the bite site, and potentially dislodge any other unattached ticks that might be present but not yet feeding. Always use shampoos specifically formulated for pets to avoid skin irritation or toxic reactions.
- Check the entire body thoroughly: Ticks are master hiders. Beyond the commonly missed spots, ensure a meticulous full-body check after any outdoor excursion. Pay close attention to:
- Ears: Inside the ear canal and along the outer edges.
- Armpits and groin: Warm, moist areas that ticks favor.
- Between toes and paw pads: Easily overlooked areas but common for ticks picked up from walking through grass.
- Around the tail and under the collar: Areas where ticks can attach unnoticed.
- Around the eyelids and mouth: More sensitive but not uncommon hiding spots. Regular, thorough checks are essential, especially during peak tick season, as prevention and early removal are the best defenses.
C. Environmental Impact of Tick Disposal
While convenient, certain tick disposal methods can have unintended ecological consequences. Choosing environmentally responsible disposal methods is part of a holistic approach to pest management.
- Burning and flushing: These methods, though seemingly quick, carry significant drawbacks.
- Burning: Incinerating ticks, especially outdoors, contributes to air pollution. It releases carbon dioxide (a greenhouse gas) and, if incomplete combustion occurs, can produce harmful particulates and volatile organic compounds that are detrimental to air quality and respiratory health.
- Flushing: Sending ticks down the toilet (especially if they were contained in a plastic bag) can contribute to microplastic pollution in waterways. Furthermore, wastewater treatment plants are designed to handle human waste, not necessarily to neutralize all pathogens carried by ticks. While unlikely to cause widespread outbreaks, there’s a theoretical risk of biological contamination or disruption to the delicate microbial balance of treatment systems.
- Recommended alternatives: For both effectiveness and minimal environmental impact, we strongly advocate for containment methods that ensure the tick’s demise without ecological harm.
- Chemical containment (alcohol): Submerging the tick in a small container of rubbing alcohol (isopropyl alcohol) or hand sanitizer kills it quickly and preserves it, allowing for potential identification later if needed. This method is highly effective and contains any potential pathogens.
- Physical containment (freezing): Placing the tick in a sealed plastic bag and freezing it for several days is another effective method. Freezing kills the tick and also preserves it for identification, all without releasing harmful substances into the environment.
- Tightly sealing in tape or a ziplock bag: Simply wrapping the tick tightly in several layers of adhesive tape or placing it in a well-sealed plastic bag and then discarding it in the trash is often sufficient. The lack of air and physical pressure will eventually kill the tick, preventing its escape and further environmental interaction.
By being mindful of these special considerations, individuals can not only protect themselves and their pets more effectively from tick-borne diseases but also contribute to more responsible environmental practices.
Comprehensive Best Practices for Tick Removal: Beyond the Basics
Effective tick removal is not just about getting the tick off; it’s about minimizing the risk of disease transmission and ensuring safety. Adhering to proven best practices is crucial for anyone who spends time outdoors. Here’s an expanded look at the essential steps for handling a tick bite:
1. Act Quickly – Time is of the Essence
- Original: Remove the tick within 24 hours if possible.
- Expanded: The paramount rule in tick removal is speed. Remove the tick within 24 hours, ideally much sooner, if possible. The longer a tick remains attached and feeds, the higher the probability it will transmit pathogens causing diseases like Lyme disease, anaplasmosis, or Rocky Mountain spotted fever. Most disease transmission requires several hours of feeding (often 36-48 hours for Lyme disease), so prompt removal significantly reduces this risk. Do not delay seeking assistance if you are unable to remove it yourself.
2. Use Proper Tools – Precision is Key
- Original: Fine pointed tweezers or a dedicated tick remover reduce the chance of mouthpart breakage.
- Expanded: Forget old wives’ tales about burning ticks with matches or coating them with petroleum jelly – these can irritate the tick and cause it to regurgitate infected fluids into the bite wound. Always use fine-tipped tweezers or a specialized tick removal tool.
- Fine-Pointed Tweezers: Grasp the tick as close to the skin’s surface as possible, ideally at the head or mouthparts, not the body. Pull straight upward with steady, even pressure. Avoid twisting or jerking, which can break off the mouthparts and leave them embedded.
- Dedicated Tick Remover: These tools are designed to effectively lift the tick without squeezing its body, further reducing the chance of mouthpart breakage and minimizing potential fluid expulsion. Follow the manufacturer’s instructions, typically involving sliding the tool under the tick and gently levering it out. Leaving mouthparts embedded can lead to localized infection or inflammation, though it typically does not increase the risk of tick-borne disease transmission itself. After removal, clean the bite area thoroughly with rubbing alcohol, an iodine scrub, or soap and water.
3. Contain Immediately – Prevent Escape
- Original: Submerge in alcohol or seal in a bag to prevent escape.
- Expanded: Once the tick is successfully removed, immediate containment is vital. Submerge the tick in rubbing alcohol (70% isopropyl alcohol or higher) or seal it securely in a small, airtight container (like a pill bottle) or a sturdy Ziploc bag. This prevents the tick from escaping and potentially biting someone else, or from crawling back onto the host. The alcohol will kill the tick efficiently, and a sealed container ensures it cannot get out.
4. Choose the Right Disposal Method – Safe and Smart
- Original: For most home scenarios, alcohol plus a sealed bag is the gold standard; freezing is an excellent alternative.
- Expanded: Proper disposal is more than just throwing it away; it ensures the tick is completely neutralized and can be used for identification if needed. For most home scenarios, submerging the tick in alcohol (to kill it) followed by sealing it in a bag or container is the gold standard. This ensures the tick is dead and safely contained. Freezing the tick is an excellent alternative, especially if you might need it for identification or laboratory testing later, as it preserves the tick’s integrity. Do not crush the tick with your fingers, as this could expose you to pathogens. Avoid flushing it down the toilet, as ticks can sometimes survive and re-emerge, and they are not typically killed by water.
5. Document the Bite – Crucial for Medical Assessment
- Original: Date, location, and host information aid medical assessment and potential laboratory testing.
- Expanded: This step is often overlooked but can be absolutely crucial for health monitoring and diagnosis. Document the date of the bite, the exact location on the body, and any relevant host information (e.g., who was bitten, where they were when the bite occurred).
- Why it’s important: This information provides invaluable context for medical professionals if symptoms of a tick-borne illness develop. It aids in accurate diagnosis and helps determine the appropriate course of action, such as prophylactic treatment.
- Go further: Consider taking a clear photograph of the tick before disposal. If possible and if recommended by a healthcare provider, keep the tick itself (killed and contained as per step 3/4) for potential professional identification or laboratory testing for pathogens. Knowing the tick species can be highly informative regarding potential disease risks in your area. Keep this documentation for several weeks to months to monitor for any developing symptoms like a rash, fever, or joint pain.
By diligently following these expanded best practices, you significantly reduce the risk associated with tick bites, ensuring both your immediate safety and long-term health monitoring.
Final Thoughts
Ticks may be tiny, but they wield a disproportionate impact on public health. By mastering both removal and disposal, we empower ourselves to break the transmission chain before it begins. Whether you are hiking through a forest, walking your dog in the backyard, or managing a veterinary clinic, the principles outlined here apply universally.
We encourage you to keep a tick‑removal kit—tweezers, gloves, a small bottle of alcohol, and a zip‑lock bag—always at hand. A quick, confident response not only protects you and your loved ones but also contributes to a broader, community‑wide effort against tick‑borne diseases.
Let’s stay vigilant, stay informed, and stay safe.
FAQs
| Question | Answer |
| Can I crush a tick with my fingers before disposal? | No. Crushing can release infectious saliva and increase the risk of accidental exposure. |
| Is 70 % isopropyl alcohol necessary, or will 90 % work? | Both concentrations are effective; 70 % offers a better balance of tissue penetration and rapid killing. |
| Do I need to keep the tick for testing? | If you suspect disease (e.g., Lyme), keep the tick in a sealed container, preferably with a damp cotton ball, and send it to a certified laboratory. |
| How long should I keep a tick in the freezer before discarding? | At least 24 hours at –20 °C guarantees death. |
| Are there any DIY “home remedies” for disposal? | Saline solutions, vinegar, or heat from a hair dryer are not reliably lethal and are not recommended. |
1. What is a tick?
A tick is a small, blood-sucking arachnid that can transmit diseases such as Lyme disease, Rocky Mountain spotted fever, and others.
2. Why is tick removal important?
Prompt and proper removal minimizes the risk of infection and disease transmission.
3. Can ticks jump or fly?
No, ticks crawl and attach to hosts by climbing vegetation and waiting for contact.
Tick Identification & Prevention
4. How can I identify a tick?
Ticks vary in size (from poppy seed to apple seed) and have eight legs as adults. They may be black, brown, or reddish.
5. What are the common tick species in homes and businesses?
Common ones include deer ticks (black-legged ticks), dog ticks, and lone star ticks.
6. How do ticks enter homes or businesses?
They hitchhike on pets, humans, or infested items like outdoor gear or firewood.
7. How can I prevent ticks in my yard or workplace?
- Keep grass short
- Use tick-repellent landscaping (e.g., gravel barriers)
- Apply EPA-approved tick control treatments
Tick Removal Techniques
8. What’s the best way to remove a tick?
Use fine-tipped tweezers, grasp the tick as close to the skin as possible, and pull upward steadily—do not twist.
9. Should I burn or suffocate a tick to remove it?
No, this can cause the tick to regurgitate into the bite, increasing infection risk.
10. Can I use petroleum jelly, alcohol, or nail polish to remove ticks?
No, these methods are ineffective and may stress the tick, increasing disease transmission risk.
11. What if the tick’s head stays in the skin?
Use tweezers to remove it; if unsuccessful, clean the area and let the skin heal. The body will expel it naturally.
12. Should I crush a tick after removal?
No, dispose of it by flushing it down the toilet, sealing it in tape, or soaking it in alcohol.
Post-Removal Care
13. How should I clean the bite area?
Wash with soap and water, then apply antiseptic.
14. Should I save the tick for testing?
Yes, if in a high-risk disease area. Place it in a sealed bag with a damp cotton ball and label with the date.
15. What are signs of a tick-borne illness?
Fever, rash (e.g., bull’s-eye rash for Lyme disease), fatigue, joint pain, or headaches. Seek medical help if these appear.
Tick Control in Homes & Businesses
16. How often should I check for ticks on pets or livestock?
Daily during tick season (spring to fall), especially after outdoor activities.
17. What’s the best tick treatment for pets?
Vet-approved topical treatments, oral preventatives, or tick collars.
18. How can businesses (e.g., hotels, farms) reduce tick risks?
- Regular pest control treatments
- Educate staff on tick safety
- Provide tick repellents in high-risk areas
19. Are ticks a problem in urban areas?
Yes, they thrive in parks, gardens, and even grassy sidewalks.
Commercial Tick Management
20. What professional services help with tick control?
Licensed pest control companies offer yard sprays, acaricides, and integrated pest management (IPM) solutions.
21. How often should commercial properties be treated for ticks?
Monthly during peak season (varies by region).
22. Are there eco-friendly tick control options?
Yes, including cedar oil sprays, nematodes (beneficial worms), and diatomaceous earth.
Health Risks & Medical Concerns
23. Can ticks spread diseases immediately after biting?
Some diseases (e.g., Lyme) require 24–48 hours of attachment, but others (e.g., Powassan virus) transmit faster.
24. Should I take antibiotics after a tick bite?
Only if a doctor confirms high risk based on tick species, attachment time, and symptoms.
25. Can ticks infest my home?
Most ticks don’t infest indoors, but brown dog ticks can breed indoors if brought in by pets.
Travel & Outdoor Safety
26. How can I avoid ticks while hiking or camping?
- Wear permethrin-treated clothing
- Use EPA-approved repellents (e.g., DEET, picaridin)
- Stick to trails and avoid tall grass
27. Do ticks die in winter?
Some species become dormant, but others remain active in mild winters.
Pet & Livestock Concerns
28. How do I remove ticks from dogs or cats?
Use tweezers or a tick removal tool, pulling straight out. Avoid home remedies like matches or oils.
29. Can ticks kill livestock?
Yes, heavy infestations can cause anemia or transmit diseases like babesiosis in cattle.
30. What’s the best way to protect livestock from ticks?
Pasture management (rotate grazing areas)
Regular inspections
Acaricide dips or sprays
Disclaimer: The content on this blog is for informational purposes only. Author’s opinions are personal and not endorsed. Efforts are made to provide accurate information, but completeness, accuracy, or reliability are not guaranteed. Author is not liable for any loss or damage resulting from the use of this blog. It is recommended to use information on this blog at your own terms.
